How to setup Bugzilla security
Bugzilla administrators are often asked to set up products that only a limited number of users have access to. This is very true in professional service organizations where the internal team needs to see all the bugs, but the individual clients should only see the bugs related to their project.
For example Wonderful Websites is a web design firm that builds custom websites for other companies. Currently they are building a site for Alice’s Restaurant and a site for Bob’s Garage. The designers, programmers and project managers for Wonderful Websites need to see all the bugs for all projects. Alice should only see the bugs for the Alice’s Restaurant project and Bob should only see the bugs for his website.
There are a number of steps required to make Bugzilla behave this way, but it is definitely possible. The core concepts we need to deal with are Products, Security Groups, Group Access Control and Users.
Bugzilla uses the Product as the key to gaining restricted access. In other words you can grant or deny access for a user to a product. In our example we will have two products: Alice’s Restaurant and Bob’s Garage.
Global Settings
First off set a couple of global settings. These settings prevent users in one product from seeing bugs and users in another.
Step 1
Navigate to the group security page.
Administration -> Parameters -> Group Security
Find the setting makeproductgroups and ensure that is is On.

Next find the usevisibilitygroups setting and ensure that it is On. This setting prevents someone in group A from seeing the people in group B. This is especially important if you are letting multiple clients view and/or edit their bugs.

Finally find the strict_isolation setting and ensure it is On.

Now click the Save Changes button to make these settings go into effect.
Step 2
Navigate to the edit bugs group.
Administration -> Groups -> editbugs
Delete the “.*” from the User Regexp field

Now click the Save Changes button
Create each Product
Now create each product.
Administration -> Products -> Add
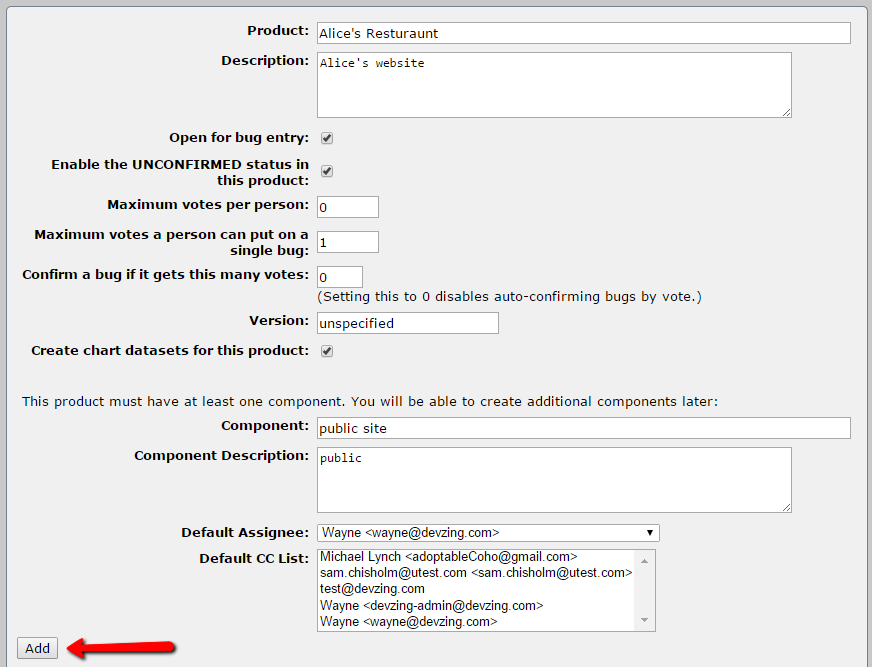
Enter the name and description. Matching Product and Group names makes it easy to keep track of what Group goes with which Product..
Enter the component name and description. Change the default Assignee to someone in the correct group. Change the Default CC List to someone in the correct group or leave none selected.
Click Add
After clicking add the product will be displayed again with additional options.
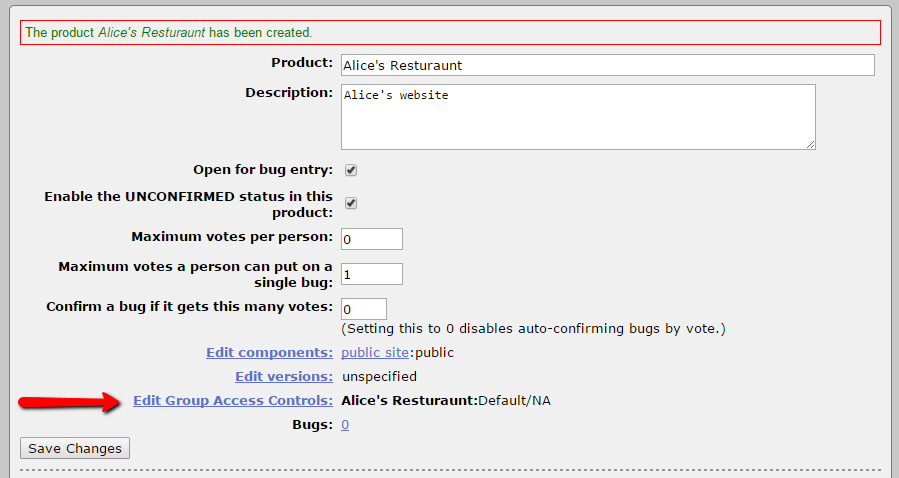
Click the Edit Group Access Controls link.

For the Group that matches this Product
- Entry: checked
- MemberControl: Mandatory
- OtherControl: Mandatory
- Canedit: checked
- canconfirm: checked
- Editbugs: checked
Click submit
Repeat for each Product.
Update Group Visibility
Navigate to the Edit Groups page
Administration -> Groups
This allows the Assign To and CC to be populated with the Group users.
Click Group name for the product you just created
In the “Groups That Can See This Group” area (scroll way down) select the same group name in the Add box
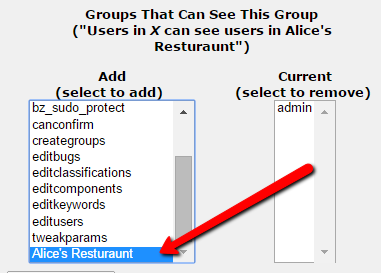
Click Update Group
Create/Edit Users
Navigate to the search users screen.
Administration -> Users
To create a new user click add new user.
Enter Login name, Real name, Password.
Click Add
Check the box in the second column next to the Group they belong to.
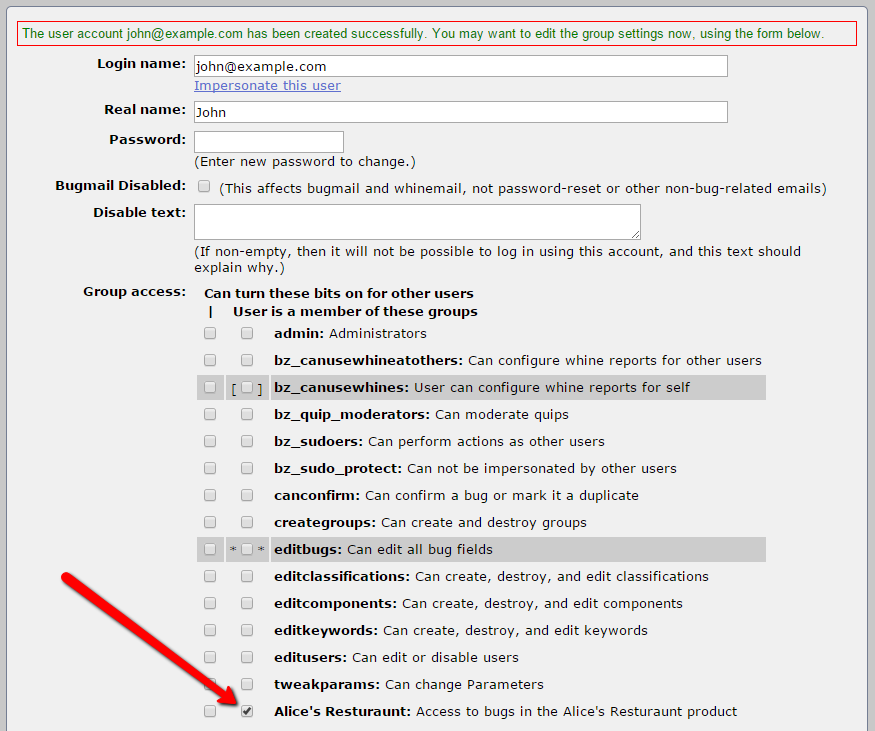
Click Save Changes.
Repeat for each user.